Introduction
Connecting to Kappa Star virtual private network - VPN - can be achived by means of a PPTP client, which is included in Windows 10 operating system. In order to connect to Kappa Star PPTP VPN follow the instructions below.
Prerequisites For PPTP VPN Access
Connecting to Kappa Star PPTP VPN requires that the following prerequisites are met:
- User account has to exist in Kappa Star Active Directory
- User account need to be granted PPTP VPN access
- PPTP port (1723/tcp) and GRE protocol (47) must not be filtered along the path between client and server
Kappa Star IT Department can help you with first two prerequisites, but the last one is beyond our reach - you will need to check with admins of the network you are connecting from.
Pay attention to the fact that some residential ISPs, mobile Internet providers, and public wifi hotspots - such as those in hotels and airports - filter Internet traffic. Don’t be surprised if VPN works from your home but not from some hotel, but also vice versa. Before you contact Kappa Star IT Support with claim that VPN does not work, try to connect from different networks if you have the opportunity.
Initial VPN Connection Creation
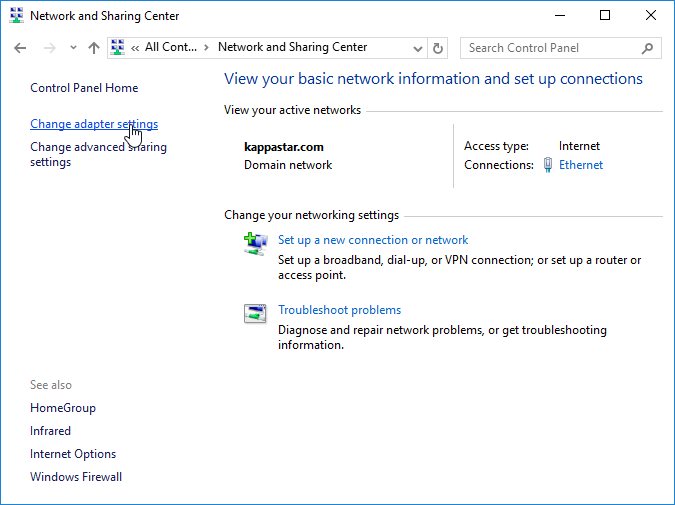
Get to control panel, and click through as shown in images below.


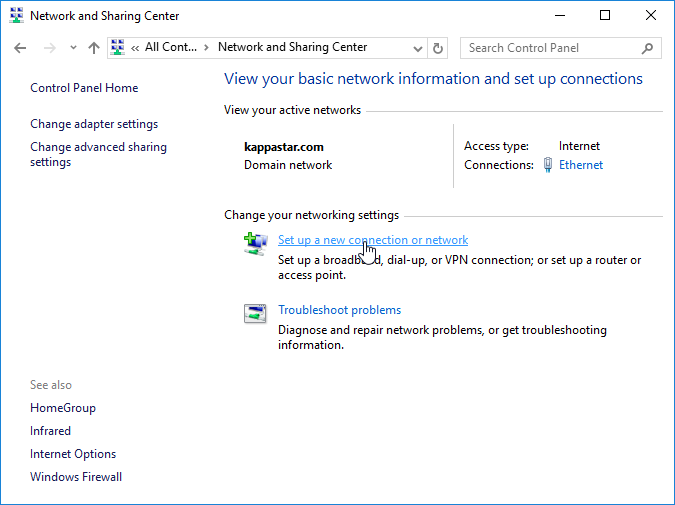
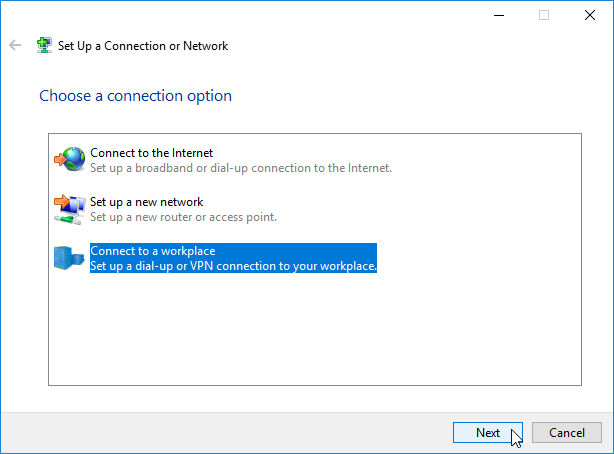
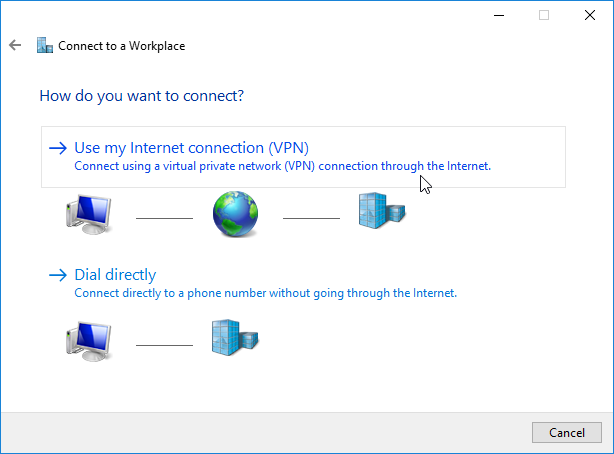
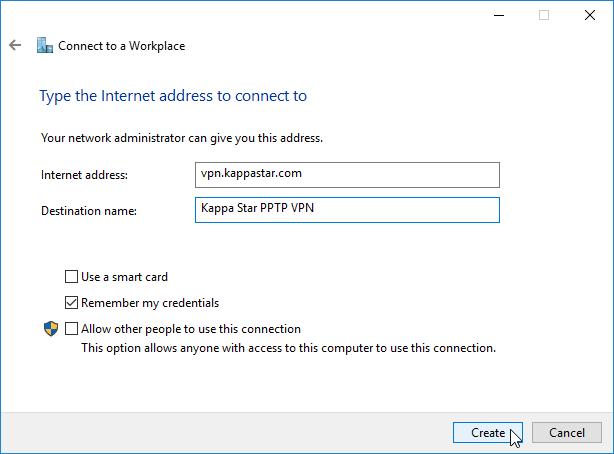
Internet address field has to be filled with exact address of VPN server - vpn.kappastar.com!
Destination name field can be filled with arbitrary string.
General settings
VPN Connection is now created, but it is not yet set up correctly. Click on Change adapter settings will show you list of network adapters.
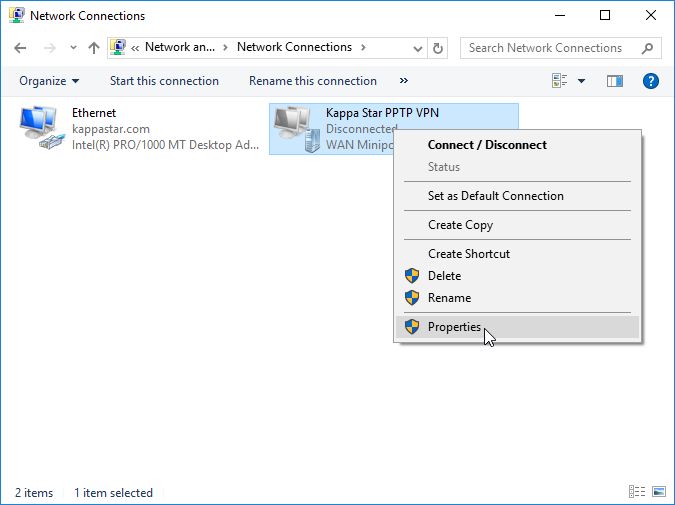
Right-click Kappa Star PPTP VPN and choose Properties...
...and finally set Type of VPN, Data encryption and Allow these protocols as shown on below image.
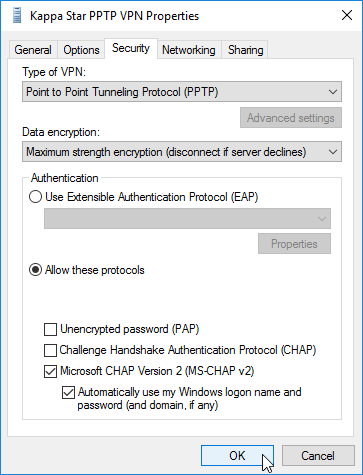
If you are connecting from a computer which is not a part of KAPPASTAR Active Directory domain, leave last tickbox unticked, as opposed to what is shown on image above.
Establishing VPN Connection
Click on network icon in taskbar shows available networks list.
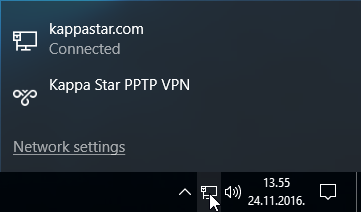
Click Kappa Star PPTP VPN...
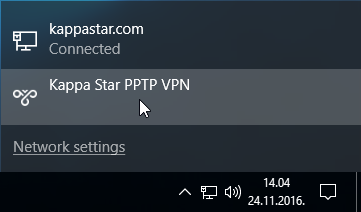
...to raise another window with list of VPN connections.
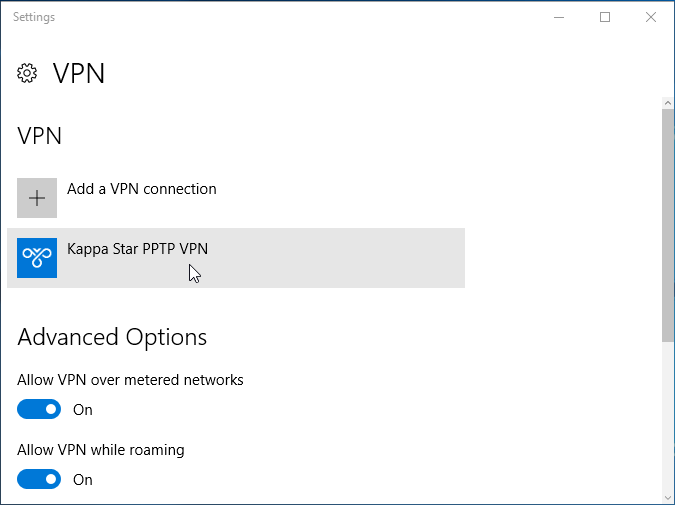
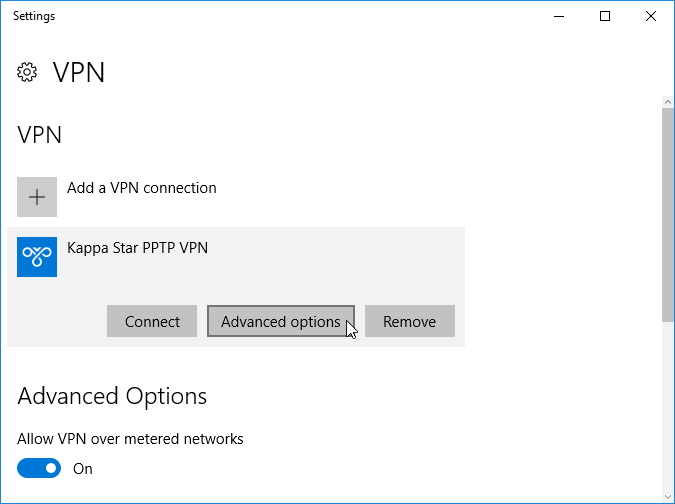
Click Kappa Star PPTP VPN to expand it and see buttons as shown on picture below:
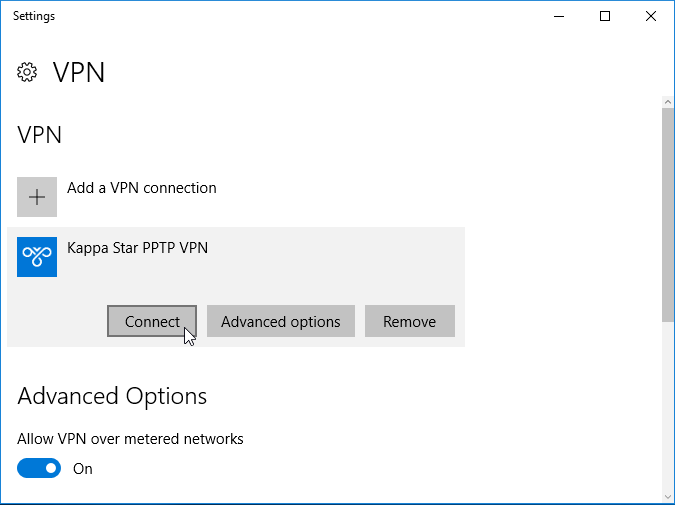
Click Connect button to establish VPN connection. If everything went well, you are now connected to Kappa Star PPTP VPN - notice that Connected is displayed under connection name:
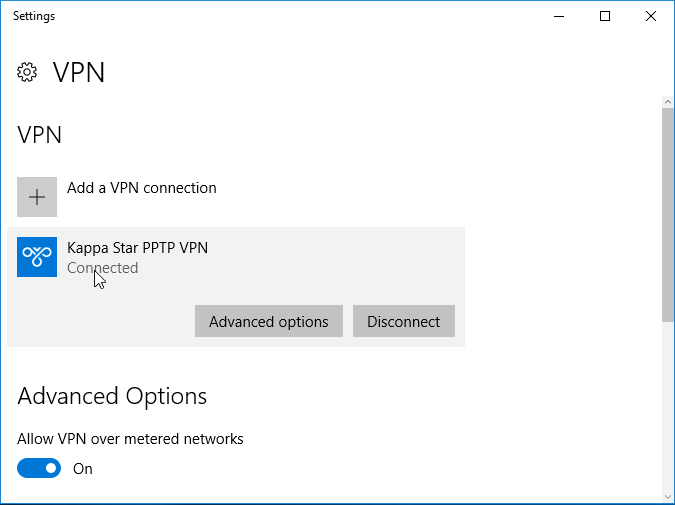
If you are connecting from a computer which is not a part of KAPPASTAR Active Directory domain, there is additional step which needs to be done - you will be presented with Sign in dialogue where you need to enter your credentials.
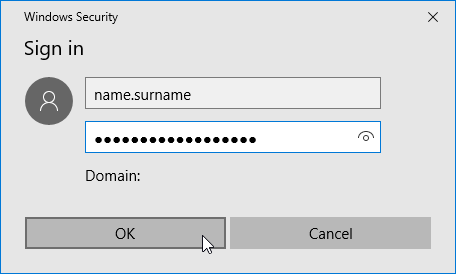
Once again, if everything went well, you are now connected to Kappa Star PPTP VPN - notice that Connected is displayed under connection name:

Terminating VPN Connection
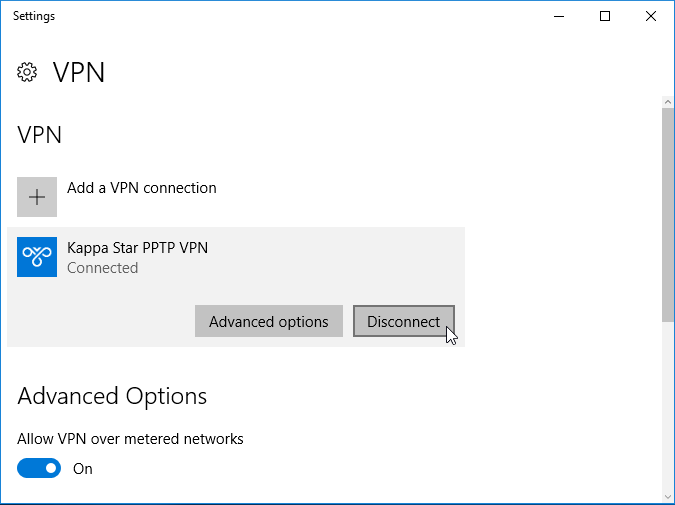
You can disconnect from active VPN session by pressing Disconnect button in VPN section of Settings:
Clearing Saved Credentials
This part concerns only users which are connecting from computers which are not a part of KAPPASTAR domain.
Provided you followed the manual to the word, and didn’t untick Remember my credentials tickbox at the final stage of initial vpn connection creation, those credentials will be automatically saved, which is a nice feature which eliminates the need to enter credentials every time you connect to VPN.
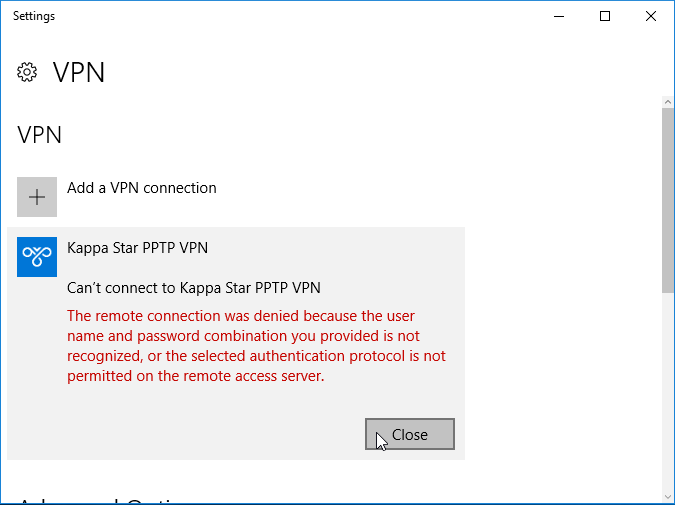
However, as all users of KAPPASTAR domain, including you, have to change their passwords at least once in 90 days, saved credentials will become incorrect after obligatory quarterly password change. Trying to connect with saved credentials after password change will present you the following screen, which you can discard by clicking Close button as shown on image below:
Clearing saved credentials can be done from Advanced options...
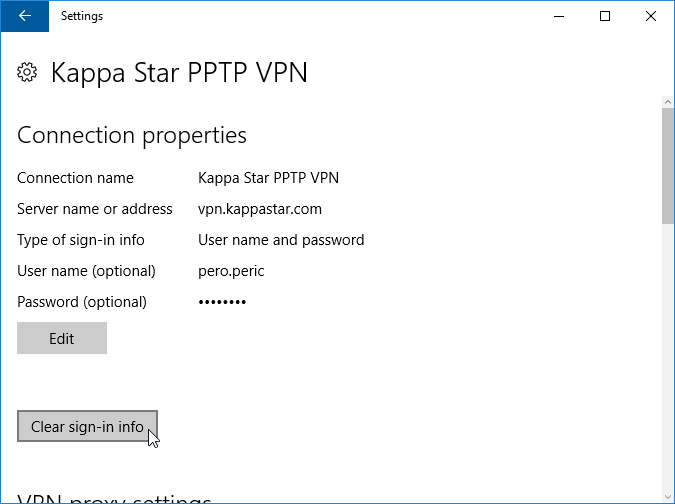
...by clicking Clear sign-in info as shown on image below:
